12/27/2014

Serape Pillow Tutorial + Giveaway!


Hey there! I hope you're having a wonderful holiday weekend! Jesse and I poked around on a few projects this weekend, but we've mostly been enjoying quality time with B and hashing ideas for 2015. Last night, I did manage to make a pillow cover from an old serape blanket I bought a while back. As it turns out, there was enough fabric to make TWO pillow covers. So, guess what?! I'm giving the second cover away! Scroll past the tutorial for the giveaway form :)

If you're feeling crafty, I put together a brief tutorial on how to make an envelope style pillow cover. Or, if sewing isn't your thing but you dig this look, scroll to the bottom and enter to win the second cover I made!
Materials:
- Serape blanket
- 20 x 20 down pillow
- Fusible interfacing
- Scissors
- Sewing pins
- Thread
- Iron
- Sewing machine

1. Measure and cut one 20" x 20" piece of fusible interfacing and two 15" x 20" pieces.
2. Position the blanket on a table or ironing board, making sure it's straight, and use a hot iron to fuse the interfacing to it (follow the package directions)
3. Cut out the fabric pieces that now have interfacing fused to them.
4. Hem one long edge of each 15" x 20" piece.
5. Pin all three pieces, right sides together. The two 15" x 20" pieces will overlap, making an envelope style opening in the back.
6. Sew all four sides, remove pins and turn it right side out.
7. Stuff with a down pillow, fluff and karate chop it!

Note: If you haven't made an "envelope" style pillow before, this post might help. It's the same concept, only with this project you start by fusing interfacing to the serape pieces to keep them from unraveling.

a Rafflecopter giveaway
This post is linked up with:
Link Party Palooza 1.9.15

12/22/2014

Making Room for Holiday Guests


Every year, Jesse and I host a big Holiday party for "grown-ups" (B has a sleepover at Grandma's). It's a fun tradition, and a great opportunity to stay up late and drink a little too much wine! We usually have everyone pile their coats and bags in our bedroom, but this year I wanted to welcome our guests with something a little more organized. 
DIY coat closet makeover for holiday guestsOur front entry got a makeover a few months ago, with a mid century cedar storage bench, coat hooks and a wall mounted box for keys and mail. The set-up provides plenty of space for our family, but with about forty RSVPs for yes, we were going to need a few more hooks!
front entry with mid century bench, DIY coat hooks
There are two huge storage closets in the hallway. plus a smaller coat closet. We removed the doors from the large closets (you know I like to remove closet doors!), hung stamped curtains in front of one and left the other closet open. We were storing our bikes and B's stroller in open closet, but winters are long around here and the closet needed to be painted anyways so we re-located everything to the basement. We might bring the bikes back up in the summer, depending on how often we are using them.
DIY coat closet makeover for holiday guests
After cleaning out the closet, I patched a few holes and then painted it white. I needed about twenty coat hooks and the most basic option at the hardware store cost about two fifty. I was able to save on cost by using salvaged hooks from Habitat ReStore, along with a couple new and previously owned. I spray painted all the hooks black for cohesion and Jesse helped me space and mount them. I love the quirky look of the mis-matched coat hooks, plus I saved about twenty bucks!
DIY coat closet makeover for holiday guests
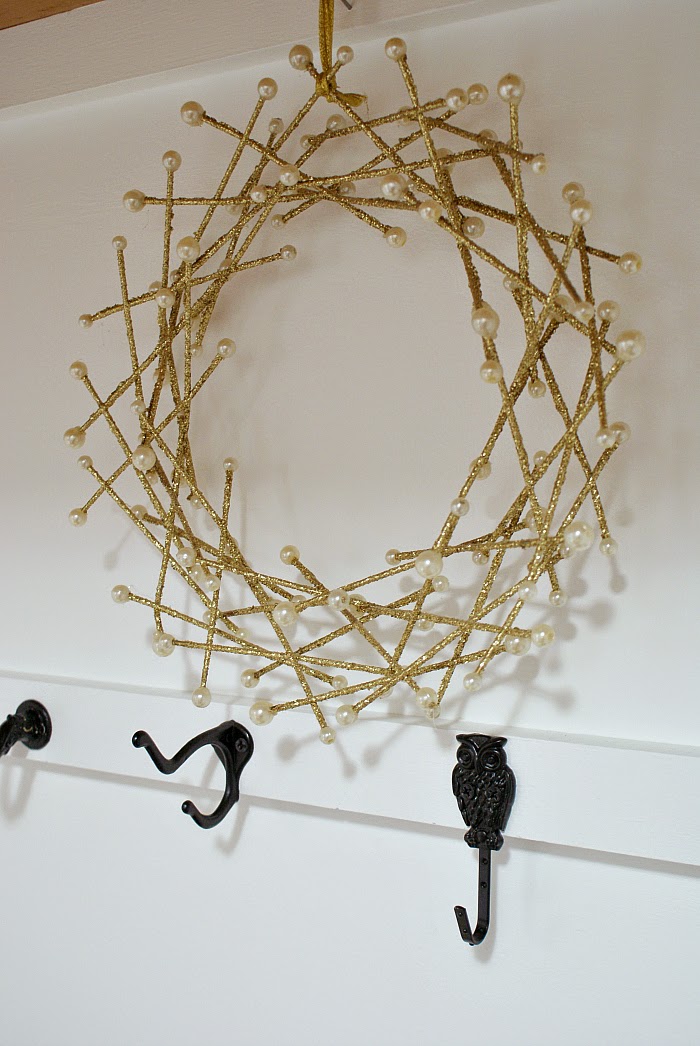
Once the hooks were mounted, I added our Bertoia chair along with some inexpensive accessories. The gold wreath was an estate sale find and the brass coat hangers are vintage as well. My dad has some antique brass coat check tags which would have been super fun to hang on the hooks, but he wouldn't hand 'em over...I'm going to keep bugging him about it!
DIY coat closet makeover for holiday guests


DIY coat closet makeover for holiday guests
Our house is relatively small, but I feel very lucky to have these extra closets for flexible storage space! Where do you ask guests to put their things when you host? I grew up putting them on a designated bed, is that just a Midwest thing?

12/01/2014

Christmas Traditions Tour - A Kid Friendly Tree!


I was so excited when Rachel at Like a Saturday asked me to participate in her annual Holiday Blog Tour! This year's theme is "Christmas Traditions" so I thought it would be fun to share our new tradition of putting a kid friendly tree in B's room! If you are stopping by via Delineate Your Dwelling, and are planning to make some of Amy's yummy spritz cookies, please feel free to send a batch to me!

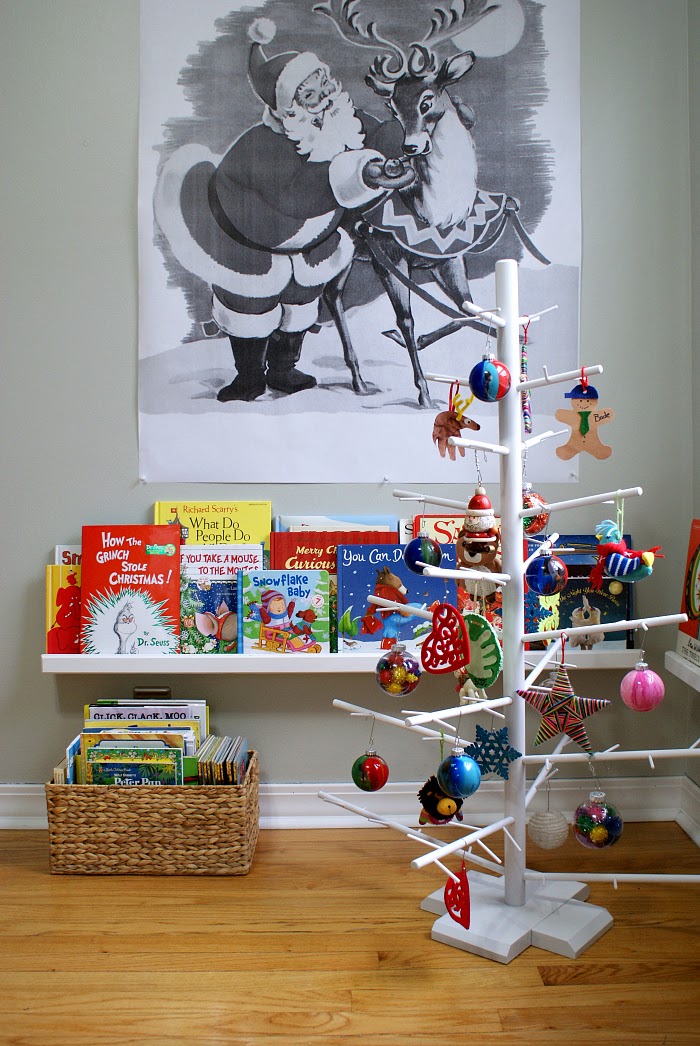
We had so much fun decorating a Christmas tree in B's room last year that we decided to make it a tradition. I thought about doing a retro tinsel tree, but after spotting a couple of Scandinavian style dowel trees on Pinterest, I was smitten. I showed Jesse the pictures and he was able to whip this up in a couple of hours. I tell ya, I really don't know how I got so lucky. It's like living with a genie!
Wooden Dowel Kids Christmas Tree, Retro Engineering Print
We wanted the tree to be colorful and kid friendly (i.e. inexpensive non-breakable ornaments); so we used a mix of homemade, pre-owned and Target ornaments. Last year, we filled a bunch of clear plastic ornaments with brightly colored pom poms. This year, we had a great time squirting paint into ornaments and shaking them up to make pretty abstract spheres - a fun weeknight art project!
Wooden Dowel Kids Christmas Tree, Retro Engineering PrintAfter the dowel tree was finished and decorated, I thought it would be fun to add something holiday themed to the wall above the book ledges. I didn't want to spend a lot of time crafting something, so I searched Pinterest for vintage holiday prints and landed on this cute vintage Santa and Rudolph. A quick trip to Staples for an extra large engineering print (only eight bucks!) and we were finished!Wooden Dowel Kids Christmas Tree, Retro Engineering Print
B loves showing off his tree to guests and telling them all about the ornaments we've made. I hope this remains a tradition for many years to come!
Side note: I want to make a woodworking tutorial for the dowel tree(we took a few photos), but we have been so crunched for time lately, it might be July before it posts!

The next stop on the tour is Christmas Eve fondue with Sarah at Life on Virginia Street, check it out! Here is a list of all the fabulous Christmas Tradition posts from the tour, Happy Holidays!


This post is also linked up with: