
I'm proud to say I've managed to keep an airplane plant, several snake plants and a dieffenbachia alive this year! Since I have a green thumb and all (not really), I wanted to try adding some air plants to B's room. Being on a tight decor budget, I didn't want to shell out for fancy schmancy glass globes, so I started looking around for things I could re-purpose. As it turns out, many salvage yards have tons of inexpensive glass light globes that work perfectly for hanging air plants!

Supplies:
Supplies:
6 inch light globe - ours is from the Habitat Re-Store!
3/8 inch poplar sticks x 2 - it's a very poplar wood - get it, poplar?
Bandsaw
Yellow Carpenter Glue
Spring Clamps
Tape
Nails, #18 x 5/8ths
Fine Grit Sand Paper
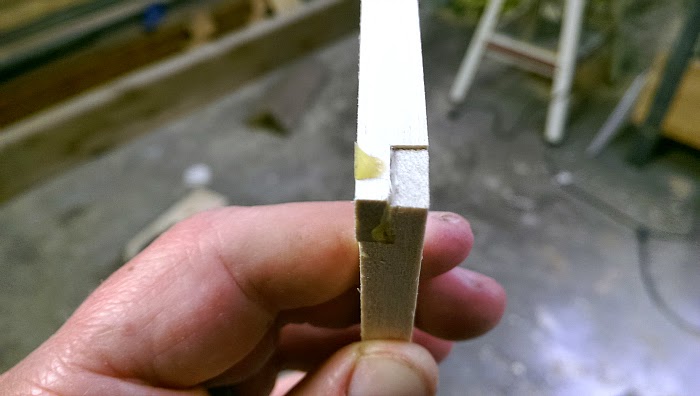
First, we made two six inch squares held together using glued lap joints. We cut the lap joints by measuring a line about 3/8ths of an inch from the end, turned the piece and made a line half way down the side. - so it looked sort of like an "L."
 Then we cut the pieces using a bandsaw. Look! That's me using a ban saw for the very first time!
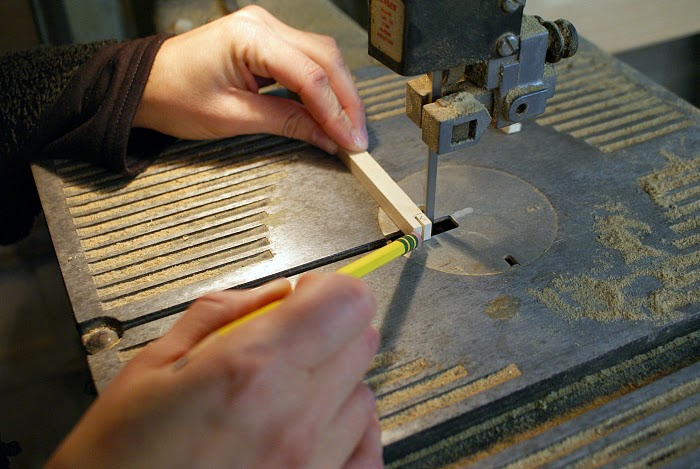 We applied wood glue to the ends and fit the joints together like puzzle pieces to make a square.
We used spring clamps on each corner to hold the square together while the glue dried overnight. Below is a picture of one square, but we made two. We checked for squareness by measuring from corner to corner.

 Next, we cut four three inch pieces of poplar for connecting the squares together in a cube shape.
The next part is a bit tricky. We arranged the light globe with one square on each side. Then we used a clamp to hold a connector piece on either side.
 Next, we added a dab of glue to the top connectors and held them in place using tape pulled tight as a clamp. Then we flipped it over, removed the clamps and did the same thing to the bottom side.
 For extra strength, we drilled tiny pilot holes at each joint, then pressed in a nail that had glue on it.
 We let the glue dry overnight before unwrapping the cube. We finished it by using a bit of fine grit sand paper to sand away little slivers and dried lumps of glue. As you can see below, the box sits well on it's own and would look neat on a desk or shelf. Since these are going in B's room, we wrapped chain around one corner so we can hang it from the ceiling. I plan to do a cluster of these over his dresser, which of course means I want to re-do the dresser now. Well, maybe just the handles...and the top...and the mirror that goes with it...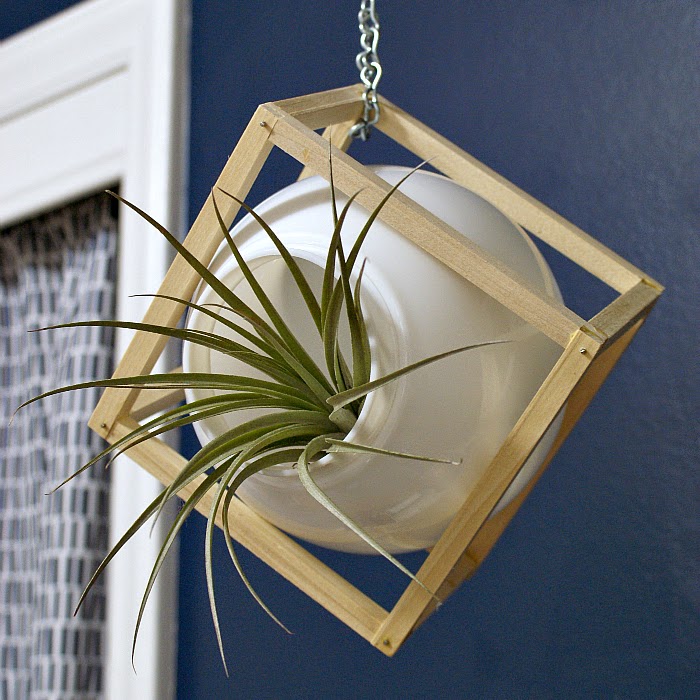


 Step 3 - Trim up the end pieces. You may want to melt the ends using a match to keep them from fraying. I recommend doing this outside because...hello fire...and it can be smelly.
