A couple years ago, before I started blogging, Jesse made a wall mounted plywood headboard for our bedroom. Originally, I covered the headboard with a yellow and white damask, which looked lovely. But, of course, I got the itch to swap the color and I also wanted to give it a more finished look using tufts. Like most of our projects, we eeked out the headboard makeover a few minutes at a time until it was finished, so it took about a week. A bit of a time investment, but it was inexpensive, looks fab and now I know how to tuft!
 The plywood headboard mounts to the wall using a french cleat, which means angled strips of wood attached to the headboard and wall fit together kinda like puzzle pieces. Unfortunately, I don't have photos of the process, so this post is mainly about how to tuft a completed headboard. However, Jesse sketched out detailed plans for me to post in case you want to give it a go. If you have a question about the construction, please shoot me an email and we'll do our best to answer it!
Supplies for Upholstering and Tufting:
measuring tape, pencildrill with 1/8th in. drill bit
quilt batting (about 4 yards)
upholstery fabric (I used a curtain panel from Target)
staple gun
10 mm Staples
upholstered buttons
backer buttons
longish sewing needles with large eyes
waxed button thread
scissors

First, Jesse took the headboard off the wall and removed all the staples from the original upholstery job (meanwhile, B and I built a marvelous fort under the dining table). Jesse measured and marked out three rows of tufting holes. All of them are 6 and 7/8ths inches apart, drilled with a 1/8th inch drill bit.
 Once the holes were drilled, I used a staple gun with 10 mm staples to upholster the headboard with a double layer of quilt batting and a curtain panel. I stapled on the batting first, then the curtain panel, pulling everything snug, but not super tight. Then I flipped over the headboard and used a steamy iron to smooth out the fabric.

Sewing the tufts was fairly simple once I figured out the technique, the crumby part was making all of the upholstered buttons. Since I was using a heavy-ish curtain panel, a craft button maker wouldn't work. Fortunately, I found a good tutorial that explained how to sew little covers for each button. It was crazy tedious, and my fabric kept unraveling so I also had to treat each circle with Fray Check before sewing it around the button. Fun stuff. On the bright side, I had an excuse to sit and re-watch a few episodes of Mad Men (brushin' up for the finale!).

About the tufting technique. I'm not a professional and I've never tufted anything before, this is just what worked for me and it was pretty simple. If you've never tried tufting, I hope you give it a shot! Now that I know how to do it, I want to tuft everything! Plus, I have a bunch of waxed thread leftover so, obviously, I need to buy a sofa or something to use the rest on!

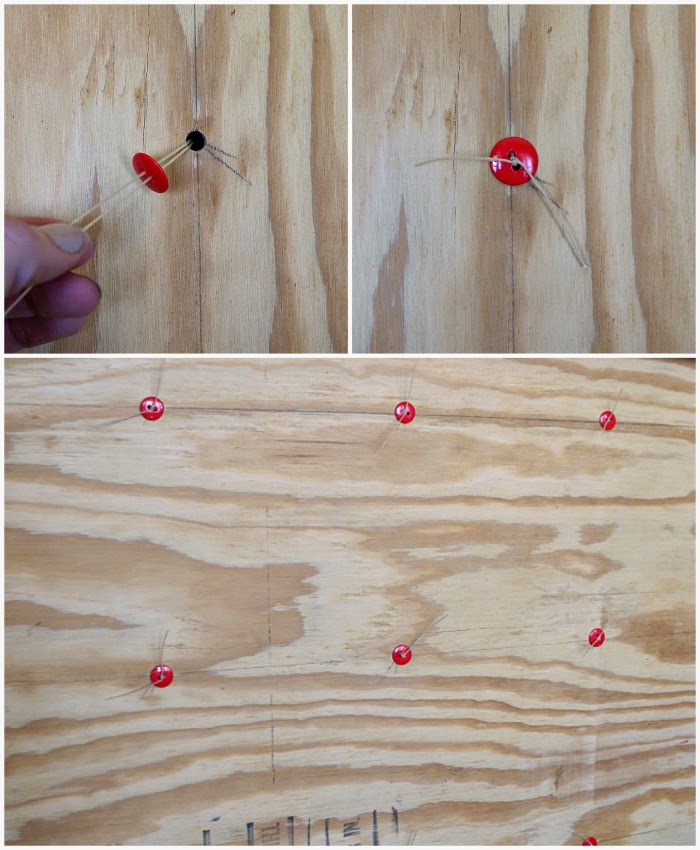
The directions on the waxed thread started by girth hitching the button shaft but that would have been impossible since there was so much fabric junk around the holes. My solution was to thread a sewing needle with waxed thread and poke it through. Then I pulled the thread almost all the way through the other side, leaving a tail which I double knotted. The wax on the thread is really grippy, so it made the knot nice and tight.

Next, I poked the threaded needle through one of the tuft holes and pulled it through on the other side, drawing the upholstered button close to the headboard. I could kinda feel the holes through the fabric and batting on the front, but it was tricky, so figured out that if I poked a sewing needle part way through from the back it worked as a sort of marker.

On the back side, I snipped the threads so I could add a backer button. Then I pulled the threads tight and double knotted them. It was a little slow going because the wax from the thread kept gunking up the eye of my sewing needle. When I do another tufting project, I'll definitely try to find needles with larger eyes.
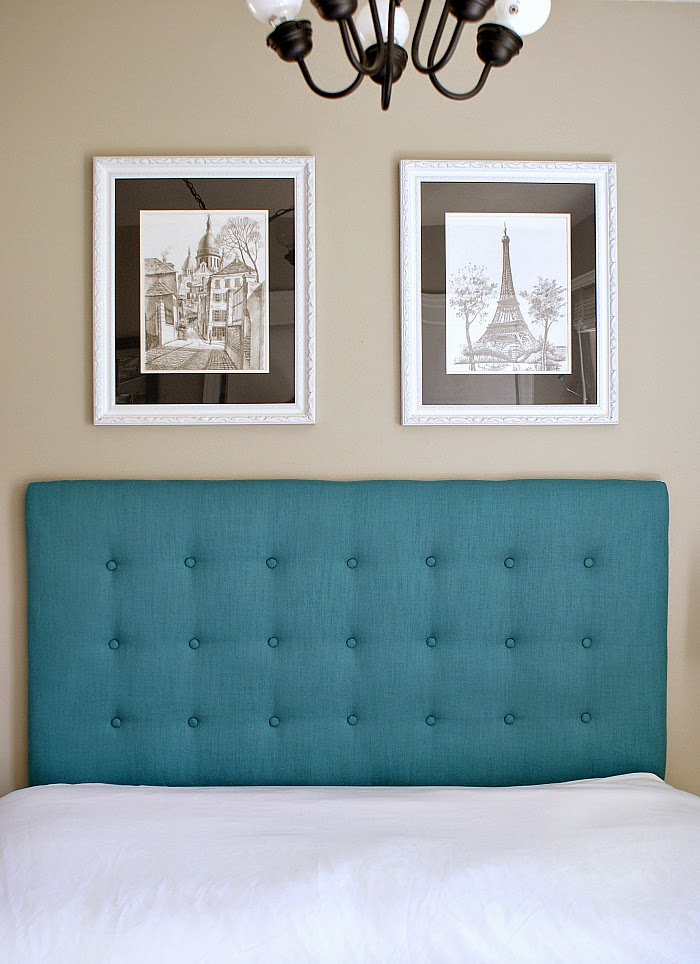
Here are a few pics of the finished product. Normally, there is a mountain of pillows on the bed, but I left them off so you could see the entire headboard.

I'm lovin' this headboard, I think teal / turquoise is officially my favorite color. I use it everywhere in the house and last week I counted six shirts in my closet that were the same shade! Funny how that works.
Lastly, just for funsies, Roxy Dog enjoying the freshly made bed :)


No comments:
Post a Comment